Here's Why Your Wildlife Photos Aren't Sharp: 8 Tips to Fix It

Do you find your photos aren't as sharp as you would like? This is a common issue that many beginner and even experienced photographers face, and it can be disheartening.
Luckily, there are several ways for you to ensure you get optimal sharpness in your photos.
In this blog post, I will give you 8 tips that can help you improve the sharpness of your photography. By using my checklist, you'll be able to identify any issues to take your craft to the next level.
If you stick around until the end, I’ll also share a bonus tip that helped me capture this super sharp photo of a great blue heron.
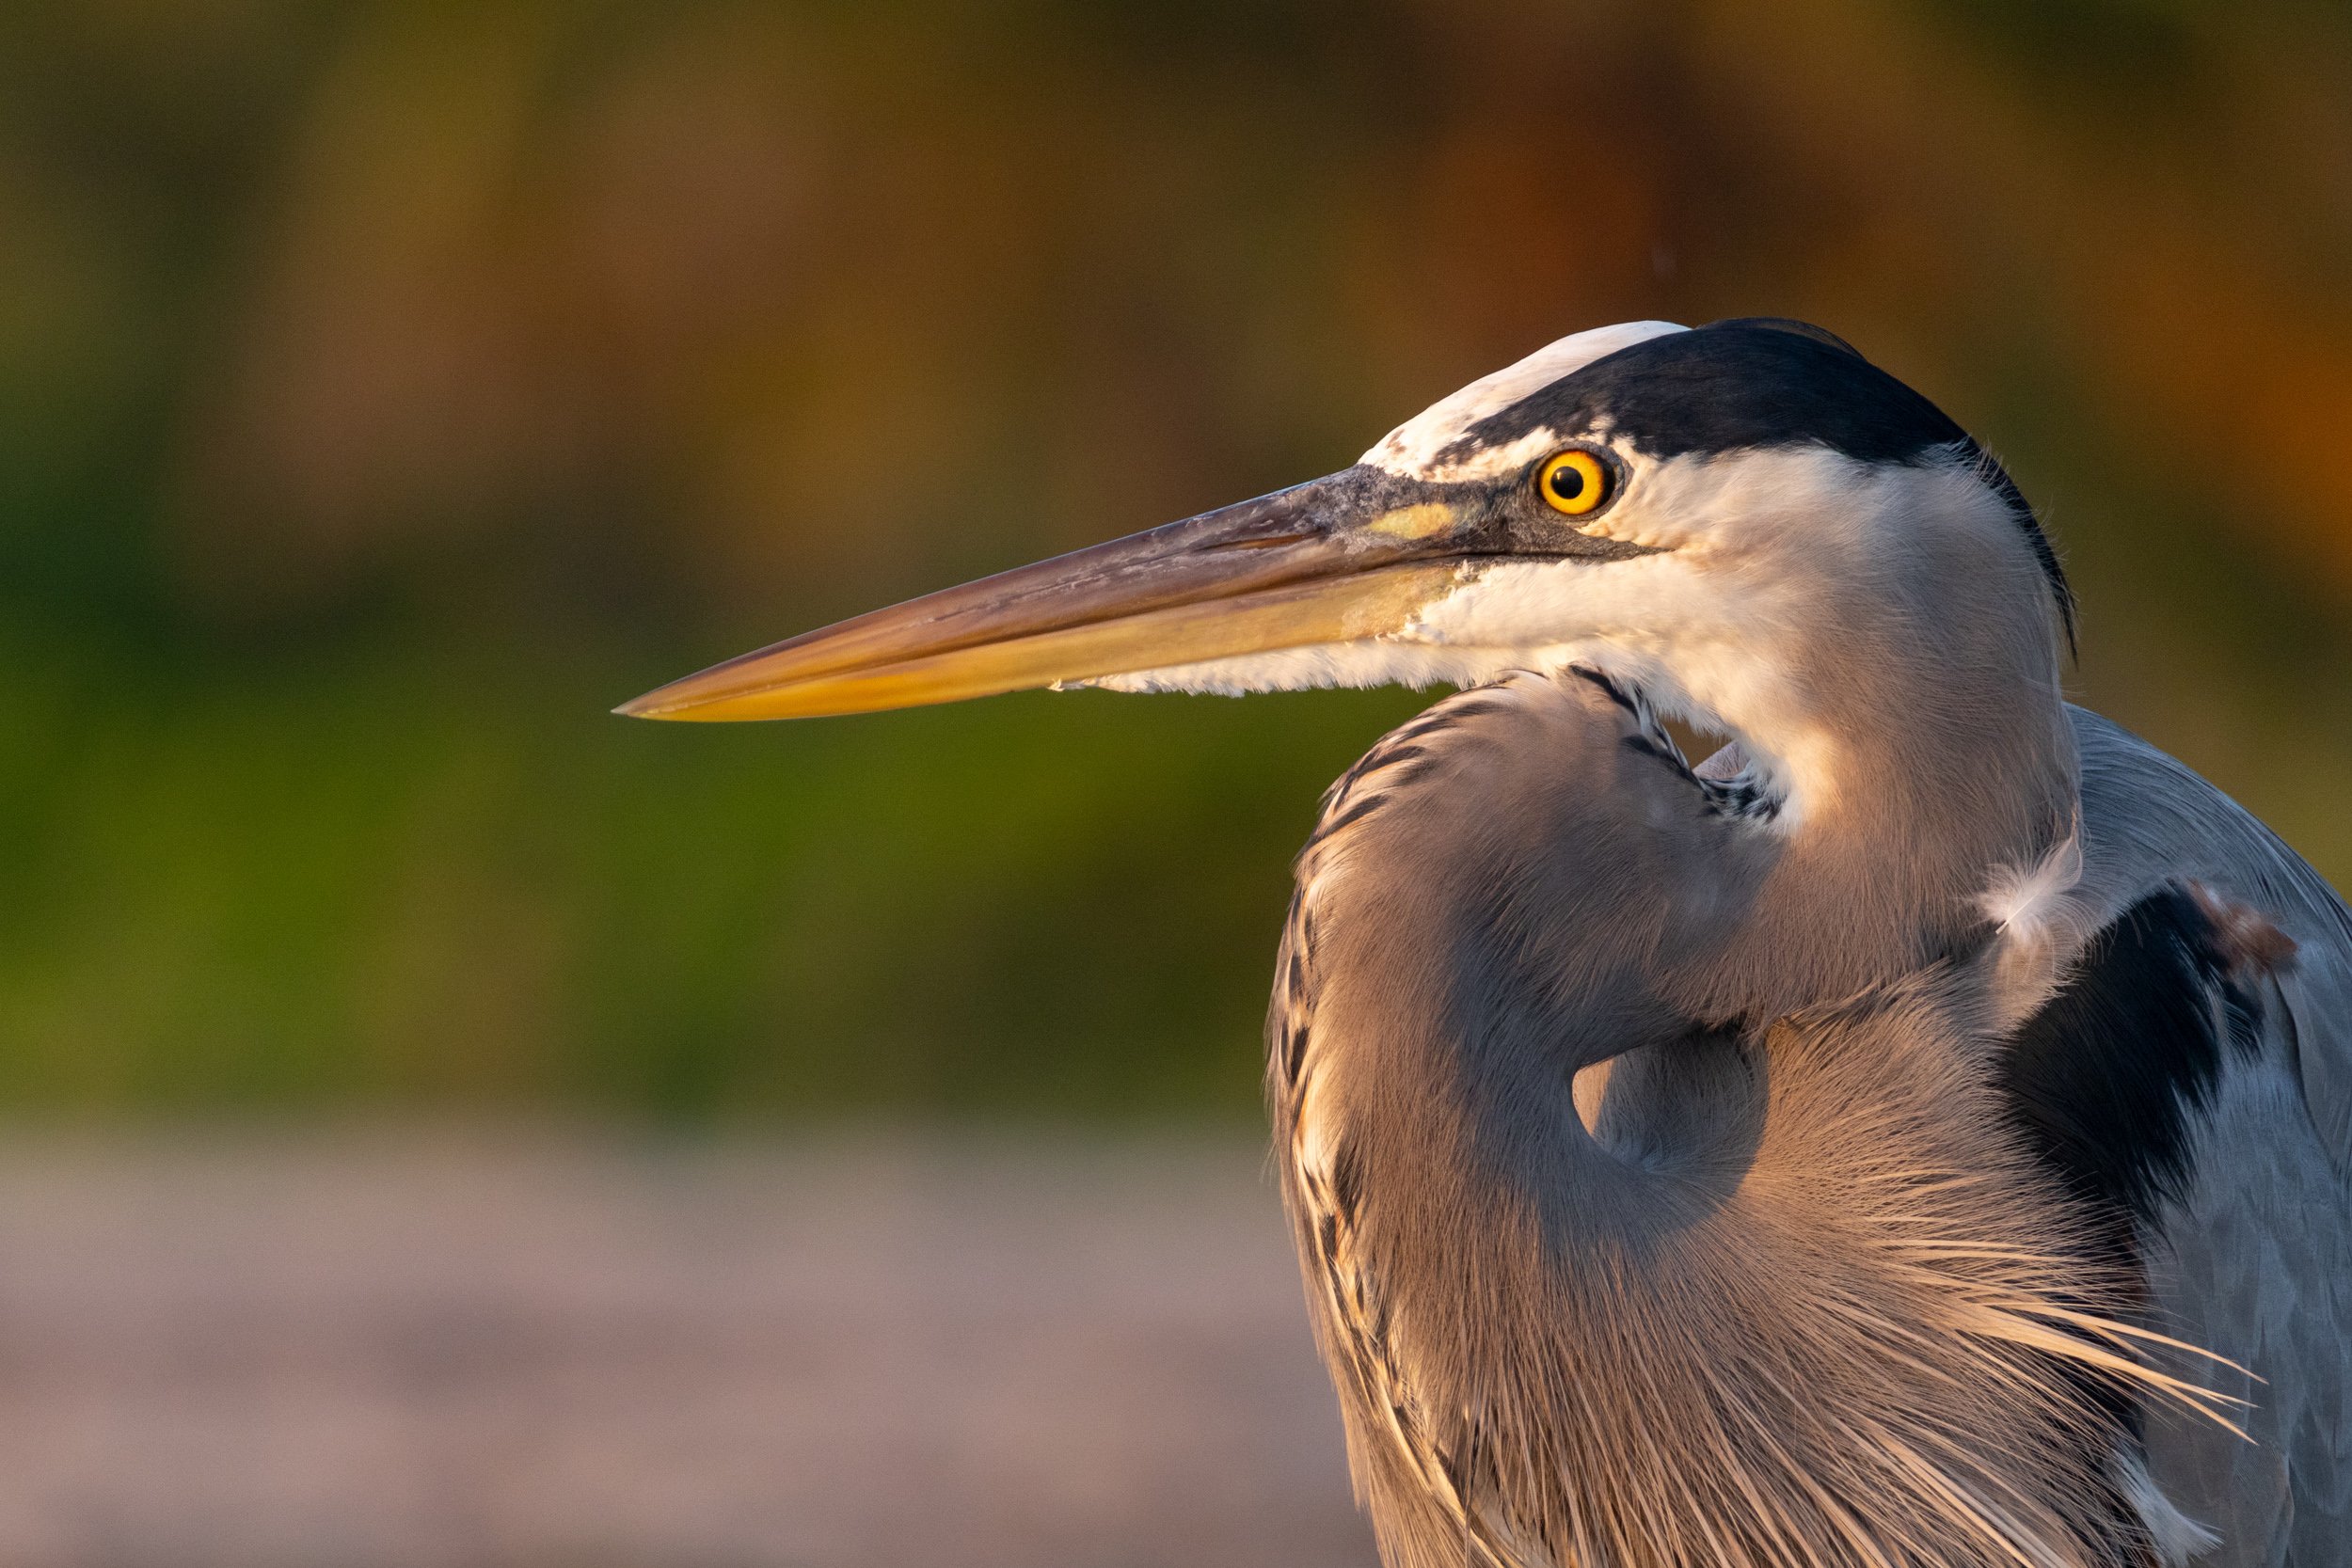
Great blue heron | Canon R10 + Canon RF 100-400mm F5.6-8 IS USM | ISO 640, 1/100, f/8 @ 400mm
Related articles
1. Shoot in the Best Light

Black-crowned night heron | Nikon D500 + 300 PF + 1.4x TC | ISO 220, 1/500, f/5.6 @ 420mm
To achieve sharpness, you need both quantity and quality of light. Sharpness is often perceived as the difference between bright and dark areas of micro-contrast. To get this contrast, you need directional light that creates sharp edges, like direct sunlight or external light sources such as flash or LED panels. If you want to get the sharpest shot possible, avoid shooting in dull, dark, overcast weather, as it scatters light and fails to create micro-contrast.
However, remember that sharpness is not the only thing that matters in photography. Sometimes shooting in low light conditions with poorer light, such as mist or cloudy days, can create stunning effects for your images that are impossible with more directional light.
2. Keep ISO Low

Southern lapwing | Nikon D500 + 300 PF + 1.4x TC | ISO 280, 1/1000, f/5.6 @ 420mm
If you're a beginner photographer, it’s essential to remember that shooting with a high ISO generally results in noisier images, poorer image quality, and reduced sharpness. This often happens if you're photographing wildlife before sunrise or after sunset.
Noisy images have less color, contrast, and detail than clean, well-lit images shot at low ISO. Therefore, a common rule to follow is always to try to shoot in better light with lower ISO to achieve more detail and contrast in your photos.
3. Use the Right Shutter Speed

Ruddy turnstone | Nikon D500 + 300 PF + 1.4x TC | ISO 1000, 1/1000, f/7.1 @ 420mm
In this case, we’re referring to two issues:
Not using a faster enough shutter speed
Not using a slow enough shutter speed
These may seem at odds, but we’ll walk through it together.
On the one hand, a shutter speed that is too slow leads to blurry subjects and camera shake.
To freeze the movement of your subject, you need a faster shutter speed. That’s why I knew I needed a shutter speed of 1/1000 to freeze this super quick ruddy turnstone, one of the most common shorebirds where I’ve lived. When hand-holding your camera, you also need a fast enough shutter speed to mitigate yours and the camera’s movement.
On the other hand, using a shutter speed that is too fast can sometimes be unnecessary and introduce additional noise that costs you valued sharpness. For example, if there’s a stationary subject, you won’t need nearly as much shutter speed as you would with one that’s moving.
4. Focus Properly

American white ibis | Canon R10 + Canon RF 100-400mm F5.6-8 IS USM | ISO 250, 1/500, f/8 @ 325mm
To take a sharp photo, your subject must be in focus. Lack of focus is one of the biggest culprits of soft images.
Most cameras have two types of autofocus systems: one-shot or AF-S, as it’s known on Nikon, is used for static targets, whereas continuous autofocus (known as AF-C on Nikon and Sony or AI Servo on Canon) keeps adjusting focus while you press the button, which is more suitable for moving subjects. For many sports and wildlife photographers, the latter is their preferred focus method.
5. Avoid Heat Distortion

Little stint | Nikon D500 + Nikon 300mm f/2.8 + 2x TC | ISO 1000, 1/3200, f/11 @ 600mm
Heat waves caused by hot surfaces can ruin photos by refracting light, causing soft and out-of-focus images. This can occur in open areas exposed to the sun, such as meadows, fields, deserts, sand dunes, and beaches.
Long lenses, the standard in wildlife photography, can compress the heat waves, making the distortion more noticeable, especially at a distance.
This problem can occur not only on hot days but also in cold environments where the sun warms the air at the surface.
To improve your chances of reducing heat distortion, try the following:
Getting closer to your subject
Shooting earlier in the day
Moving into the shade
For example, I was photographing this little stint near my family home in Spain from very far away with my Nikon D500 and Nikon 300mm f/2.8 VR II with a 2x teleconverter. In reviewing my photos (and even looking through the viewfinder), I saw visible heat waves making the bird look out of focus and soft. To improve this, I stopped down my lens to f/11 and got as close as possible while not flushing the shorebird, which gave me far better results.
Although these steps may help prevent heat distortion, sometimes you cannot avoid it. In these cases, as photographers, we’re better off accepting that and waiting for a better opportunity.
6. Shoot at the Sharpest Aperture

Red-legged partridge | Nikon D500 + Nikon 300mm f/2.8 + 2x TC | ISO 1000, 1/1000, f/11 @ 600mm
Although we all love shooting at the widest aperture to get the creamiest background possible, this isn’t always necessary, nor will it produce the best results.
Most lenses are sharper in the center than on the edges. By stopping the lens down (reducing the aperture), you use the part of the lens that offers the highest quality and sharpest results. For instance, instead of shooting my 300mm f/2.8 wide open, I will sometimes stop it down to f/4 or even f/5.6 to increase my sharpness. And if I have a 2x teleconverter on it, I will go as low as f/11, if needed.
All cameras and lenses are different, so experiment with different apertures to find the optimal sharpness for your lens and camera body combination.
7. Use stabilization

European golden plover | Canon R10 + Canon RF 100-400mm F5.6-8 IS USM | ISO 640, 1/100, f/8 @ 300mm
Stabilization is another essential aspect of getting sharp photos. Even with the best lighting and camera settings, shaky hands can still result in blurry images. There are two ways our gear can help us prevent camera shake.
A tripod is a useful tool for wildlife photographers, especially when using long telephoto lenses. It provides a stable base for your gear, allowing for slower shutter speeds without introducing camera shake.
Another option is to use a lens with image stabilization or your camera’s in-body image stabilization (IBIS). These systems help to reduce camera shake by compensating for small movements in the body or lens.
Image stabilization can be very helpful when shooting handheld, especially with today’s technology. With my Canon R10 and RF 100-400mm, I’m able to get consistently sharp results at shutter speeds of 1/100 and even 1/50 at 400mm.
When choosing a lens or camera with stabilization, make sure to research the type of stabilization it has and how effective it is. Some systems may be more effective than others, depending on the camera or lens manufacturer.
8. Shoot in burst mode
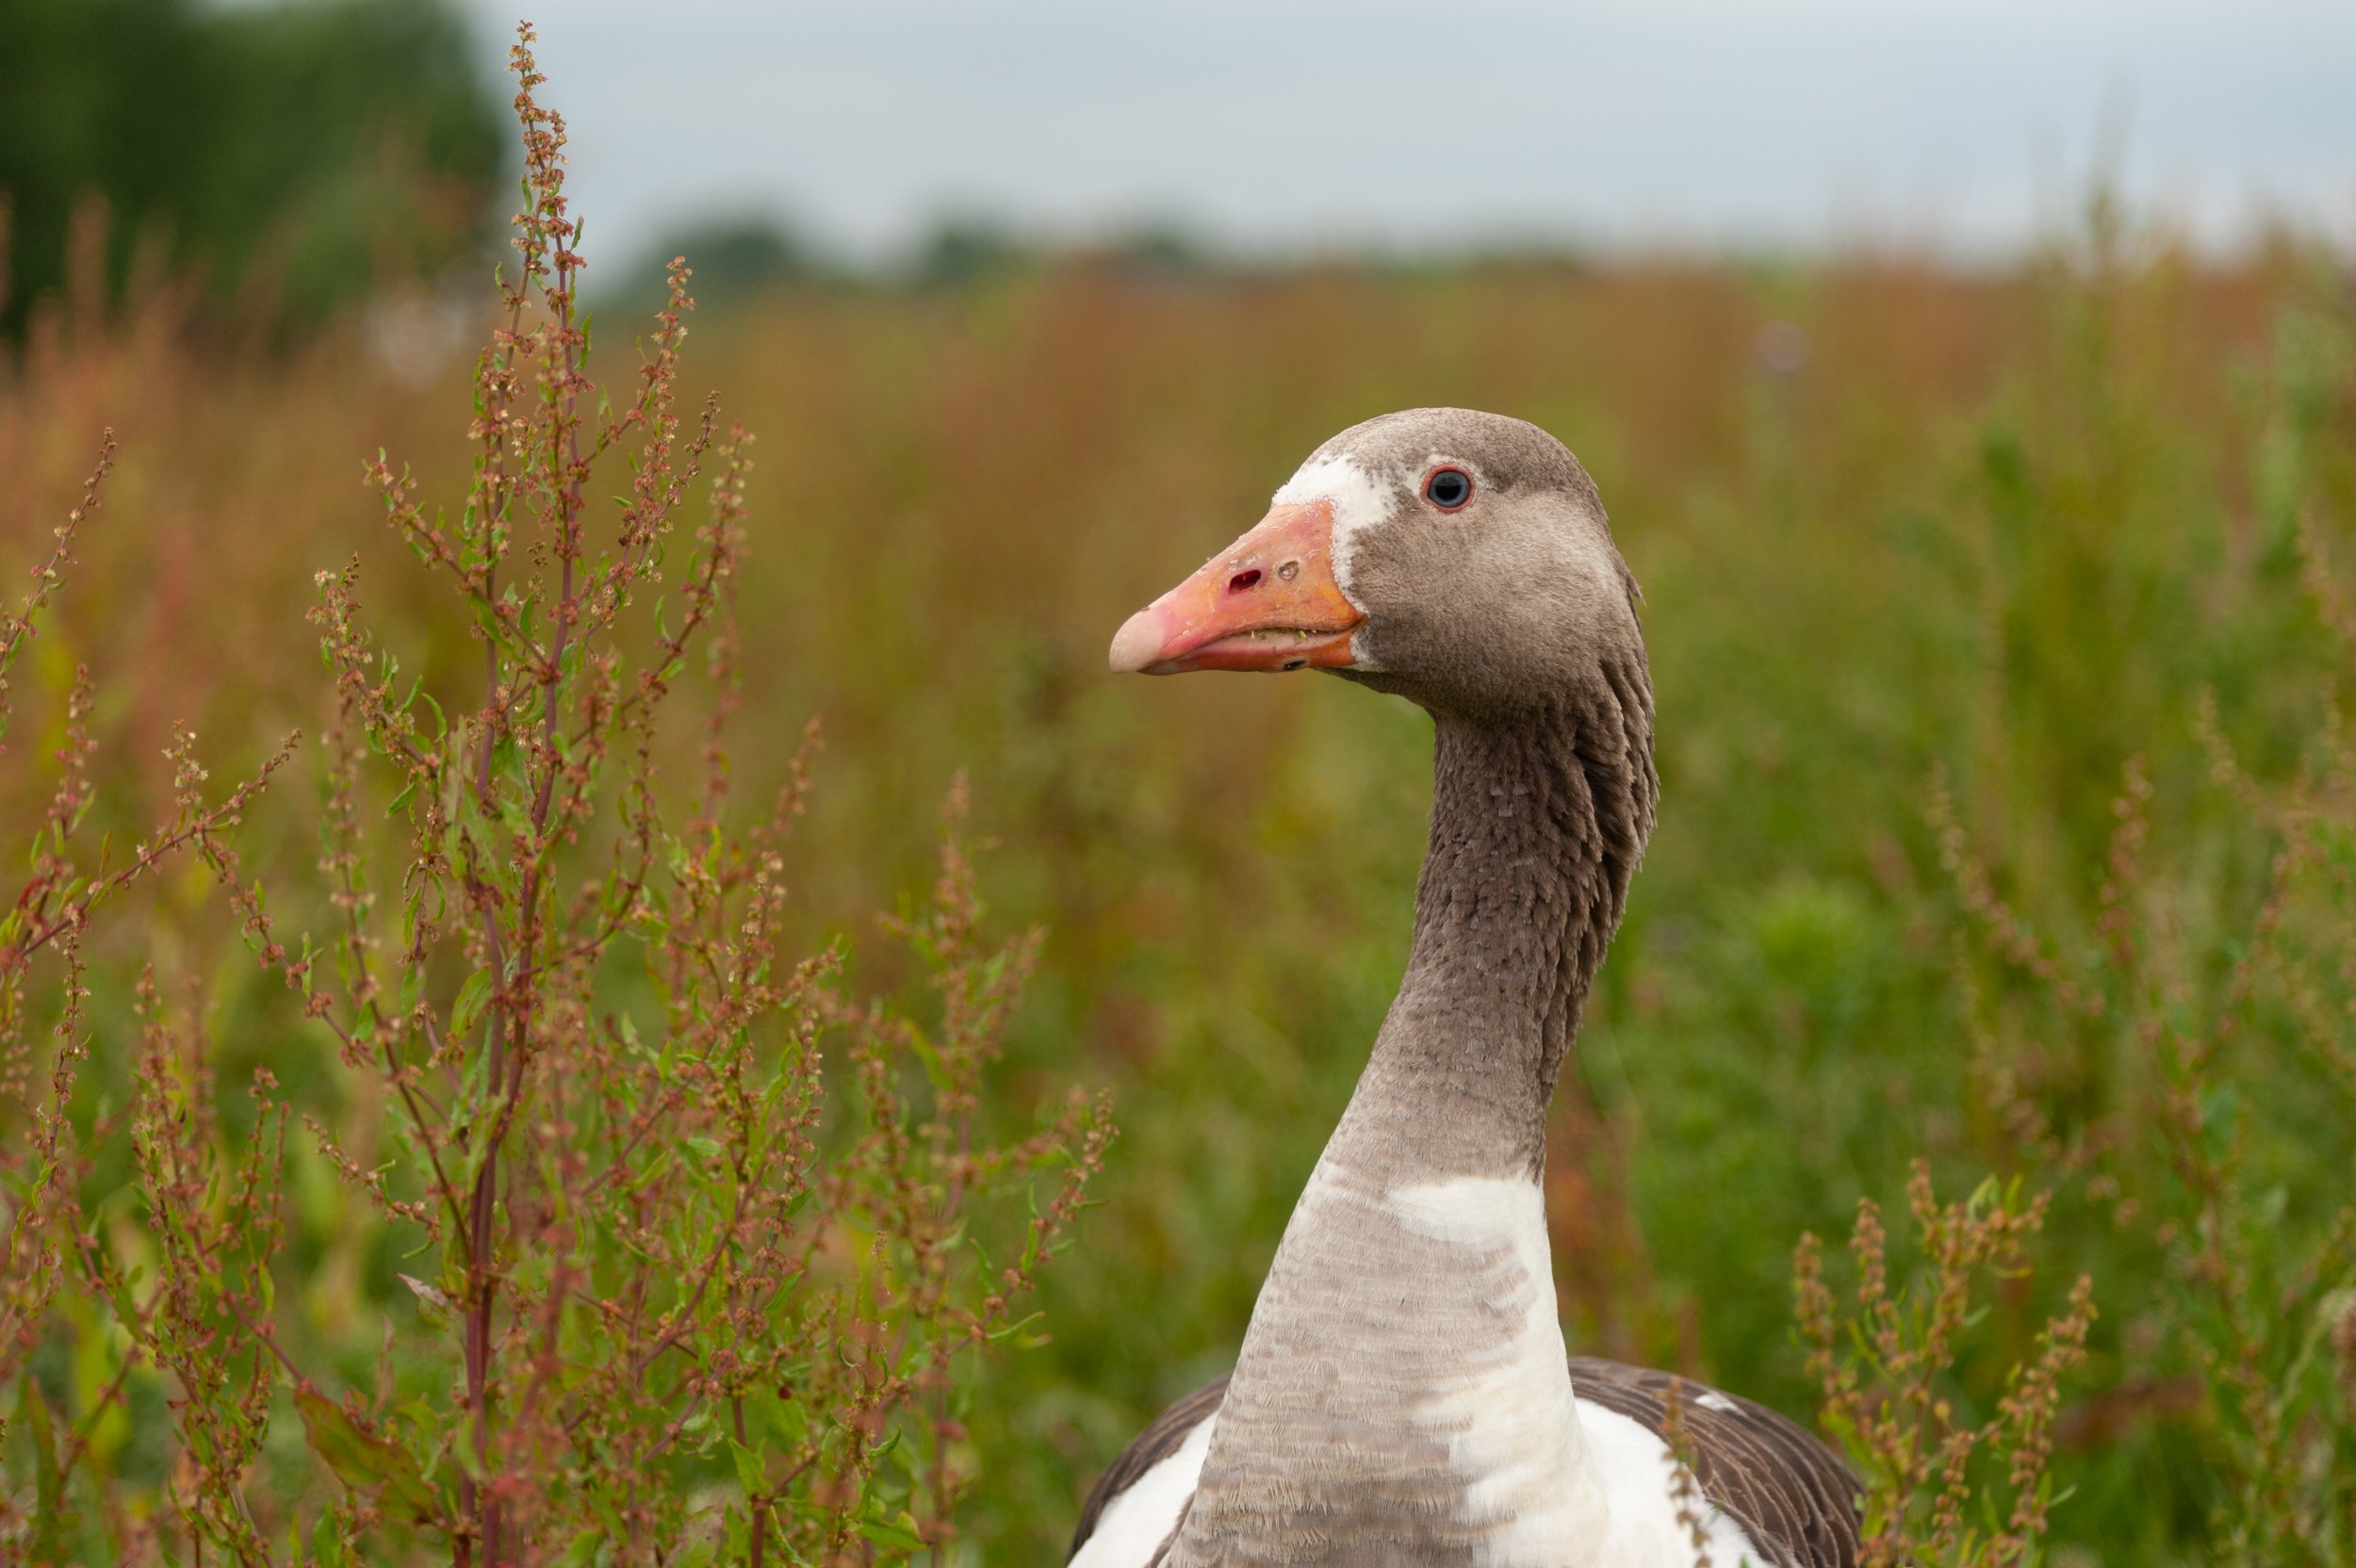
Greylag goose | Nikon D700 + Nikon 70-300mm f/4.5-5.6E ED VR AF-P | ISO 250, 1/1000, f/4.8 @ 100mm
One of the most powerful techniques to increase your chances of capturing the sharpest photo possible is burst mode. Also known as continuous shooting, this feature allows you to take multiple shots in rapid succession, which is especially helpful when photographing moving subjects like wildlife.
Using cameras with high frame rates, such as the Nikon D500 (10 frames per second) or the Canon R10 (23 frames per second), can significantly improve your ability to capture the perfect shot in burst mode.
Remember to be mindful of your camera's buffer when using burst mode, as it can quickly fill up and slow down your camera's performance. A high-speed memory card can help mitigate this issue and allow you to shoot continuously for longer.
Overall, burst mode is a valuable tool for any photographer to capture the sharpest and most compelling images, especially when photographing wildlife or other fast-moving subjects.
Bonus Tip: Improve Your Hand-Holding Technique

Greater yellowlegs | Nikon D700 + Nikon 70-300mm f/4.5-5.6E ED VR AF-P | ISO 1400, 1/2000, f/5.6 @ 240mm
As promised, here’s your bonus tip. It might just be the most important one!
As photographers, we can’t expect to move our cameras around aimlessly, expecting sharp photos. We previously mentioned that higher shutter speeds can mitigate camera movement, but solid stabilization and hand-holding technique also go a long way. Doing this properly is crucial in getting sharp photos; it doesn’t happen overnight. It takes a lot of practice.
To improve your technique while shooting, try this:
Tuck your elbows in against your chest to prevent camera movement.
Hold the camera and lens somewhat tightly to control shutter movement.
Use the viewfinder instead of the back LCD for a more stable shooting experience.
If you’re panning for moving subjects, move your entire upper body as you do instead of just your arms.
Gently press the shutter button or roll your finger over it to avoid camera movement.
These techniques are fundamental with very long focal lengths and even more so with teleconverters since they magnify all your mistakes.
Even if you're using a mirrorless camera with an electronic shutter, which reduces many of these concerns, these stabilization techniques will still help you get sharper photos.
Use these tips to get your own sharp photos!
With these 7 tips and a bit of practice, you can take your photography to the next level and capture sharp, stunning images.
Remember, it's not just about the technical aspects but also about creativity, composition, and storytelling. So grab your camera and start exploring!
Want to become a better wildlife photographer?
If you are interested in learning more about the technical and artistic side of photography to take your photos to the next level, check out these awesome tutorials that can help you take amazing wildlife photos!