How to Photograph Shorebirds (Tutorial)

Have you ever tried to photograph shorebirds?
Many of you may have seen a shorebird at different times throughout the year, such as their migrations in the spring and fall, their breeding season in the summer, or during the winter months in warmer climates.
Seeing one of these incredible winged athletes can be easy, but getting great photos of shorebirds is a real challenge.
How do you get close? How do you find them? What are the best settings to photograph them?
These questions and more are why I decided to write this blog. I want to help you prepare for the next time you see a shorebird or your next migration. In this blog post, I will give you 10 tips on how to photograph shorebirds.
What are shorebirds?
Before getting into the 10 tips, let’s learn a little bit about them. After all, understanding your subjects is a crucial part of wildlife photography.
Shorebirds, also called “waders” in the United Kingdom, are a large group of generally small birds with long legs and wings. They feed by foraging for insects, crustaceans, and other small animals along wetlands or coasts.
Some common species in Europe include sanderlings and ringed plovers, while in North America, there are killdeer, and spotted sandpipers, to name a few.
However, apart from these few species, there are more than 200 others. They can be as small as the least sandpiper (5.1-5.9 in / 13-15 cm) or as large as the greater yellowlegs (11.4-13.0 in / 29-33 cm), or even bigger like the Far Eastern curlew (60–66 cm / 24–26 in)!

Least sandpiper with greater yellowlegs in the background | Nikon D500 + 200-500 mm f/5.6 | ISO 1320, 1/2000, f/5.6 @ 500 mm
Shorebirds can be long distance migrants
Many species breed in the northern hemisphere as far north as the Arctic of North America, Asia, and Europe and migrate to wintering grounds much farther south. For instance, the semipalmated sandpiper flies more than 5,000 km / 3,000 miles nonstop from Canada to South America! That’s nothing compared to the bar-tailed godwit, which flies 9 days straight for 12,000 km / 7,400 miles from Alaska to New Zealand.
If you want to read more about epic shorebirds migrations, check out this article by All About Birds.
Without further ado, let’s discuss the 10 tips on how to photograph shorebirds.
1) Respect the birds

Semipalmated sandpiper | Nikon D500 + 200-500 mm f/5.6 | ISO 360, 1/500, f/5.6 @ 500 mm
The first thing any wildlife photographer should pack in their bag is 2000 mm of respect. The brand does not matter.
But, no, seriously. Respect should be top of mind when in the field.
In the case of migrating shorebirds, they fly thousands of kilometres or miles, and need to dedicate their precious time to stocking up for the journey to their breeding or wintering grounds.
Believe me, I think you would rather the sanderling you are shooting devote its resources to feeding rather than to flying away from you.
Wait, don’t chase
If you take anything away from this blog, it’s that chasing birds is never the way to go. I can tell you that when you do this for a photo, it is never worth it.
The bird will fly away from you in a panic and you will not get a better photo because of it… or if you do, it will not have been in the most ethical way.
As a rule of thumb, walking directly at any birds will scare them off. With shorebirds, walking up to them slowly can work, but I have achieved the best results from getting down on the ground, waiting, and crawling towards them, which I will discuss more later.
Like any skill, approaching birds takes time to get good at and no one is perfect.
It’s likely that while you continue to learn how to approach them you will mess up and scare them at times. However, as long as you keep their best interest in mind and reflect on how you can be more ethical next time, I think you are doing the right thing.
2) Use eBird to research species and locations

Screenshot of page from eBird
eBird is an awesome tool for tracking bird sightings in your region. You can look at individual species, their maps, local hotspots and other great birding locations, and even add your sightings to the citizen science database so other people can enjoy birding.
Hotspots are great for finding locations where many species can be seen at once. Be aware, however, that what is good for birding may not be for wildlife photography. This is the case with some parks where there may be fences or signs preventing you from getting close.
I regularly use eBird before heading out for a shoot to be able to plan where to go and what species to look for. The one thing it cannot tell you, though, is whether you can get into good positions to take photos, so you will have to scout the terrain once you arrive.
3) Talk to people

Black-bellied plover | Nikon D500 + 200-500 mm f/5.6 | ISO 400, 1/1000, f/5.6 @ 480 mm
Creating connections with nature lovers is a tremendously undervalued way of finding shorebirds. Being such small animals that often camouflage with their environment, having someone to guide you can be a big help.
In fact, if it hadn’t been for a birder that I had a chat with on the beach one morning, I would have never seen my first-ever black-bellied plover!
Everyone who is out searching for shorebirds loves and is excited about seeing the animals, regardless if they are birders or photographers. For that reason, it is incredibly important to respect both the birds and people observing wildlife. Remember to not prioritize your photos above others’ enjoyment of nature or the birds’ safety.
4) Use a long telephoto lens

Spotted sandpiper | Nikon D4 + 300 mm f/2.8 VR II + 1.4x TC | ISO 560, 1/500, f/4
I recommend using a telephoto lens that is at least 300 mm to help you “get close” to these birds. When I shoot, I generally use my Nikon 200-500 or one of my 300 mm lenses, the Nikon 300mm f/4 PF VR or Nikon 300 f/2.8 VR II, with the 1.4x teleconverter.
By using a crop sensor or APS-C camera like my Nikon D500, I benefit from having a 1.5x crop factor that can make the birds appear larger in the viewfinder. This means that I am regularly shooting at effective focal lengths of 600 mm or more!
While shooting shorebirds with a short lens is possible, they are generally very small and can be hard to approach, so a short lens will make it even more challenging to photograph them.
In conclusion, long focal lengths over 300 mm are a huge bonus for getting closer to a subject, but how you approach wildlife can be just as or even more important for nailing those awesome shots.
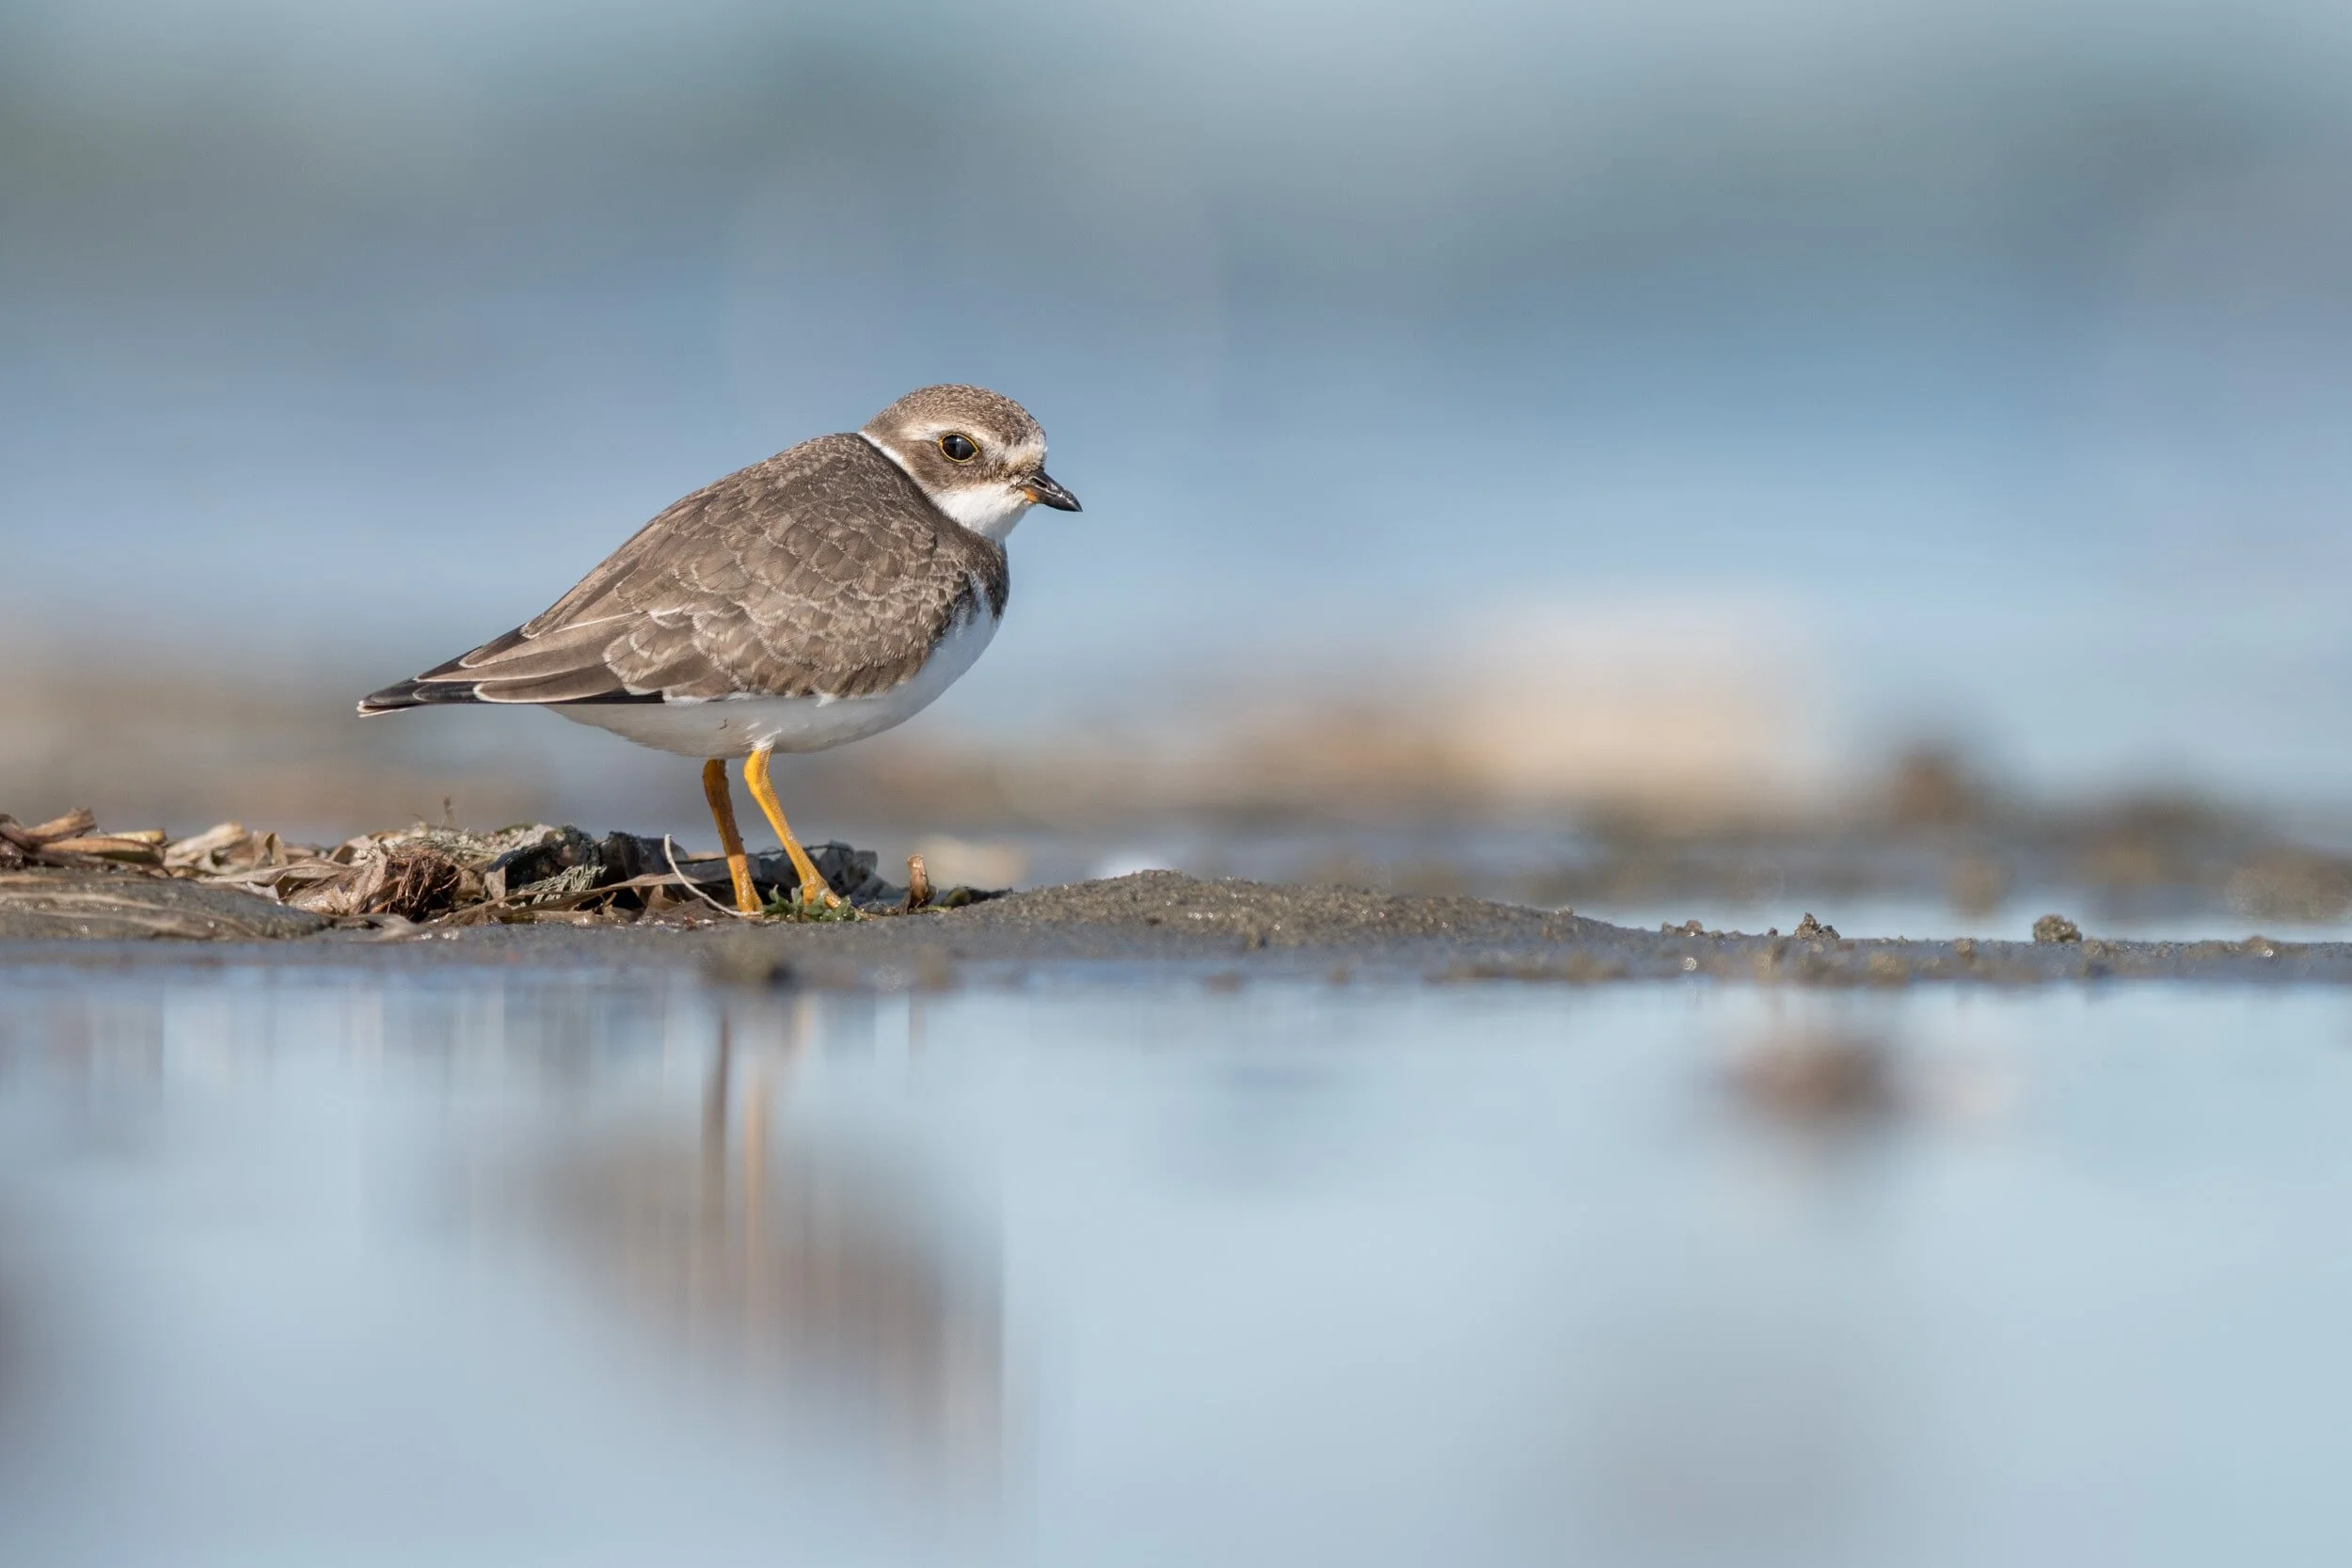
5) Get as low as possible

Ruddy turnstone | Nikon D500 + 200-500 mm f/5.6 | ISO 400, 1/800, f/7.1 @ 500 mm
When shooting birds that spend most of their time feeding on the ground, your best bet is to get as low as their eye level, if not lower.
But why?
Be less threatening
This is the most important reason for getting down on the ground. When you are low, you are not perceived as much of a threat. Compared to when I have been standing and watching shorebirds, when I am laying in the mud, they are far more willing to ignore me, go about their feeding, fall asleep, and even come so close that they are within my camera’s minimum focusing distance!
Blur your background and isolate your subject
The lower you are, the shallower your depth of field will be. This means that your background will be more out of focus, giving you more pleasing background blur or bokeh.
Getting down to eye level can blur out your background, putting all the attention on your subject. This shallow depth of field helps to eliminate distractions, such as sticks and clumps of mud, that may detract from the overall impact of your photo.
It is not impossible to photograph shorebirds from above, but I rarely recommend or do it myself because it will usually make it easier for them to blend into the background, making your photo appear flatter.
Note: Getting low is not the only factor that influences how blurred out your background will be. Other important factors are the distance between you and your subject, the distance between your subject and the background, your aperture, and your focal length. The closer you are to your subject, the farther the background is from your subject, the larger your aperture is, and the longer your focal length is, the more bokeh and subject isolation you will create.
6) Get ready to get muddy, sandy, and wet
Semipalmated plover | Nikon D500 + 300 mm f/2.8 VR II + 1.4x TC | ISO 280, 1/2000, f/5.6
I cannot stress enough how key it is for you to mentally and physically prepare for getting muddy, sandy, and wet. Shorebirds feed along waterways and wetlands, so you have to be ready for that.
While having waterproof clothing is best, like these waders I bought, avoiding getting wet is not necessary. In fact, when it’s warm enough, I often just take my photography gear, a shirt, water shoes, and a bathing suit. This way I can get wet, but without the horrible feeling of having wet pants and socks.
Protect and clean your gear
Many cameras and lenses have a certain degree of weather sealing, but I would recommend doing your best to avoid getting any mud, sand, or water on your gear.
I use LensCoat lens covers to protect my lenses on a regular basis, such as the ones for my 200-500 and 300 PF, and sometimes I might even add a plastic bag around them when I know it will be extra wet.
If your camera and lens exterior do happen to get dirty, you can use a damp cloth to clean them off when you get home.
Whenever my lens or camera sensor gets dirty, I use a camera cleaning kit, like this one, to safely remove dust and dirt by using a blower, brush, microfibre cloth, and sensor cleaning swabs.
Note: If you’ve never cleaned your sensor, check out this video by landscape photographer Nigel Danson, which helped me a lot when I first did it. Here’s another on how to clean your lenses by Pangolin Wildlife Photography.
7) Be open to other photo opportunities

Turkey vulture | Nikon D500 + 200-500 mm f/5.6 | ISO 2200, 1/1000, f/5.6 @ 340 mm
Shorebird migratory stopovers can be excellent places to photograph other species that rely on the same kind of habitat for breeding or feeding.
In fact, by revisiting the same shorebird stopover for almost 2 weeks, I was able to spend some amazing time with great blue herons and great egrets. I even came across some turkey vultures that were feeding on fish carcasses along the shore. This made for some photos that I would have never gotten otherwise.
It can be excellent to have the goal of shooting shorebirds, but don’t close yourself off to other wonderful subjects along the way.
Note: If you want to see some of my photos of different heron species, such as egrets and great blue herons, be sure to check out my Instagram, @apcwildlife15.
8) Use a fast shutter speed and burst mode

Lesser yellowlegs | Nikon D500 + 300 mm f/2.8 VR II | ISO 4500, 1/1000, f/4
In their frenzy to feed and avoid predators, shorebirds tend to move incredibly fast. For that reason, it’s important to keep your shutter speed high and shoot in burst mode. In this photo of a lesser yellowlegs, I applied this method.
If my subjects are moving around, the lowest I will generally shoot is 1/1000 of a second unless I am in very poor light.
Burst mode is crucial as well, especially if you do not have a Sony or Canon mirrorless camera with animal eye AF. Your autofocus will miss a lot of shots.
The positive thing is that the more shots you take, the more likely you are to have more in focus.
9) Shoot in the best lighting conditions possible

Greater yellowlegs | Nikon D500 + 300 mm f/2.8 VR II | ISO 140, 1/1000, f/4
Similar to all other forms of wildlife photography, try to shoot in the best light you can.
Sunrise and sunset are often the most recommended and for good reason. The light during golden hour adds a warmth and richness that is impossible to achieve at other times of day.
That said, overcast days can be great because you can shoot at any time without worrying about harsh light and deep shadows. Instead, the clouds create soft, even, diffused light over your subjects with fully detailed highlights and shadows.
Apart from the two golden hours and cloudy days, if you’re up for it, shooting in or after rain, can produce very unique lighting.
10) Experiment and break the rules
Lastly, I wanted to add that photography has a lot of rules, such as avoiding midday light, using low ISOs, or fast shutter speeds to freeze movement.
However, remember that none of these are super strict and that you will not be punished for breaking them. In fact, some of the best photographs in the world contradict these traditional rules.
That’s one of the reasons why I have experimented with slow shutter speeds, harsh light, and poor light… and have been happy with the results!
Shoot at slow shutter speeds

Semipalmated plover | Nikon D500 + 300 mm f/2.8 | ISO 4000, 1/100, f/4
If your subjects are resting or not moving around quickly, slower shutter speeds can be great for getting some shots with lower ISO. I have actually experimented with abnormally slower shutter speeds, like in the photo of the semipalmated plover above.
Note: If your subjects are moving, using a slow shutter speed and panning can also capture movement in an abstract, artistic way. I have yet to do much of this, but I look forward to exploring it further.
Shoot in “bad” light

Greater yellowlegs | Nikon D500 + 300 mm f/2.8 VR II + 1.4x TC | ISO 8000, 1/50, f/4
When we refer to bad light, we usually mean when the sun is overhead casting harsh shadows on our subjects or when the sun is so low that there is hardly any light coming through. While these situations make obtaining a pleasing image more difficult, it’s not impossible! In fact, that’s why I took photos of this sleeping greater yellowlegs way past sunrise.
Sure, my ISO was incredibly high and my shutter speed was very low, but I got a very unique photo that I would not have been able to make in “good” light.
Conclusion
Many of the practical skills we have discussed, such as researching locations, using the right camera settings, and having the appropriate gear, are important to capturing great photos of sandpipers, plovers, and all these other species.
However, a wildlife photographer’s priority should be respecting their subjects first and foremost.
If you only remember one thing from this blog on how to photograph shorebirds, I hope it is that a stunning shot is only as incredible as the ethics behind it.
And when in doubt, walk away from the shot and let the bird be.
Where to buy
If you are interested in purchasing any of the gear I used to shoot these photos, check out the links below:
If you live in Canada, Kijiji is a great place to get even cheaper gear if you are willing to buy cameras and lenses without an intermediary service, such as Amazon or eBay.