Why Manual with Auto ISO May Be the Best Setting for Photography

When I first started photography, I thought shooting in full manual mode was the best approach. However, this meant spending more time fumbling with my camera than getting keepers.
After experimenting with several different autofocus settings, manual with auto ISO has taken a weight off my shoulders and helped me improve my photography.
This trick allows you to set your shutter speed and aperture while the camera automatically selects the ISO to get a proper exposure. I use this for my wildlife photography, but it has many other applications across photography genres.
In this blog post, I will explain what manual with auto ISO is, how to use it, and why it may be one of the best settings for photography.
Related articles
The Three Settings That Affect Light
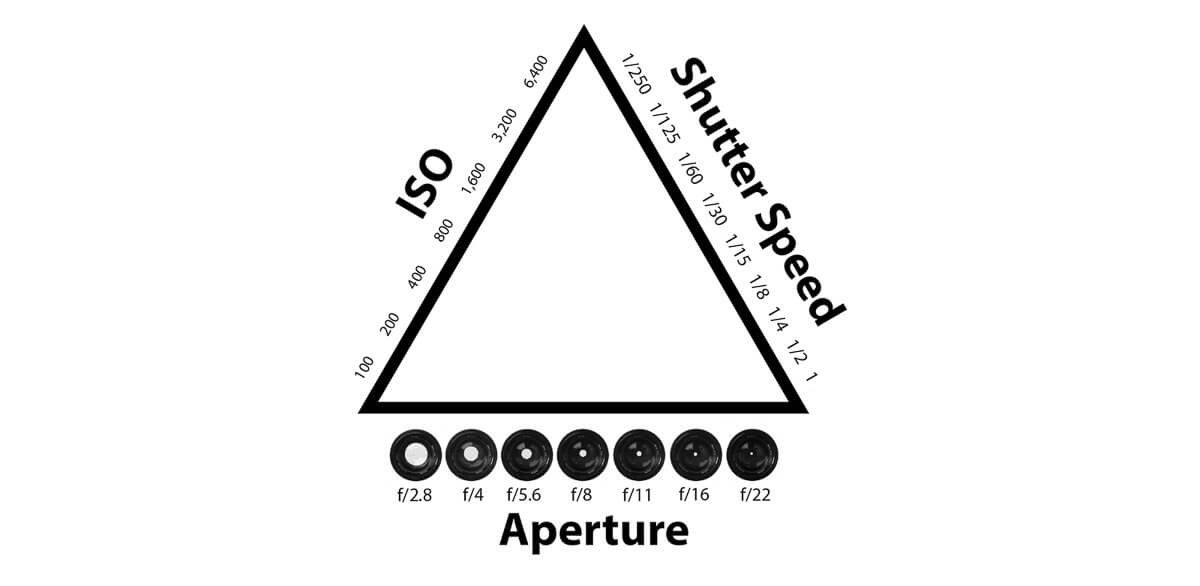
Source: Photography Life
Before I delve into why manual with auto ISO is so beneficial, let me briefly explain the three settings that affect the amount of light in your photo: ISO, aperture, and shutter speed.
ISO
This is the gain or sensitivity of your camera's sensor. A high ISO creates noise or grain in your image, while a low ISO is preferable to keep noise to a minimum.
Aperture
This opening in your lens controls how much light it lets in. A smaller aperture lets in less light and creates a deeper depth of field, while a larger aperture allows in more light and creates a shallower depth of field.
Shutter Speed
This is how long your camera's sensor is exposed to light. Faster shutter speeds let in less light but freeze action, while slower shutter speeds let in more light and can create intentional blur in your photos.
Camera Shooting Modes
Most cameras have different shooting modes. Each mode has its unique advantages and drawbacks. Understanding when to use each can help you capture the perfect shot. Let’s take a look at some of them.
Shutter Priority (Tv)
In this mode, you set the shutter speed, and the camera chooses the aperture and ISO for you. While this mode can be helpful, the camera's aperture choice may not always be ideal for the look or depth of field you want to create in your image.
Aperture Priority (Av)
In this mode, you set the aperture, and the camera chooses the shutter speed and ISO. While this mode can be handy, the camera's choice of shutter speed may not be what you need to execute the image you have in mind.
Manual
This mode lets you be the most creative because you have complete control over all three settings. However, adjusting all of your settings can be challenging in quickly changing light or when you need to shoot quickly.
Manual with Auto ISO
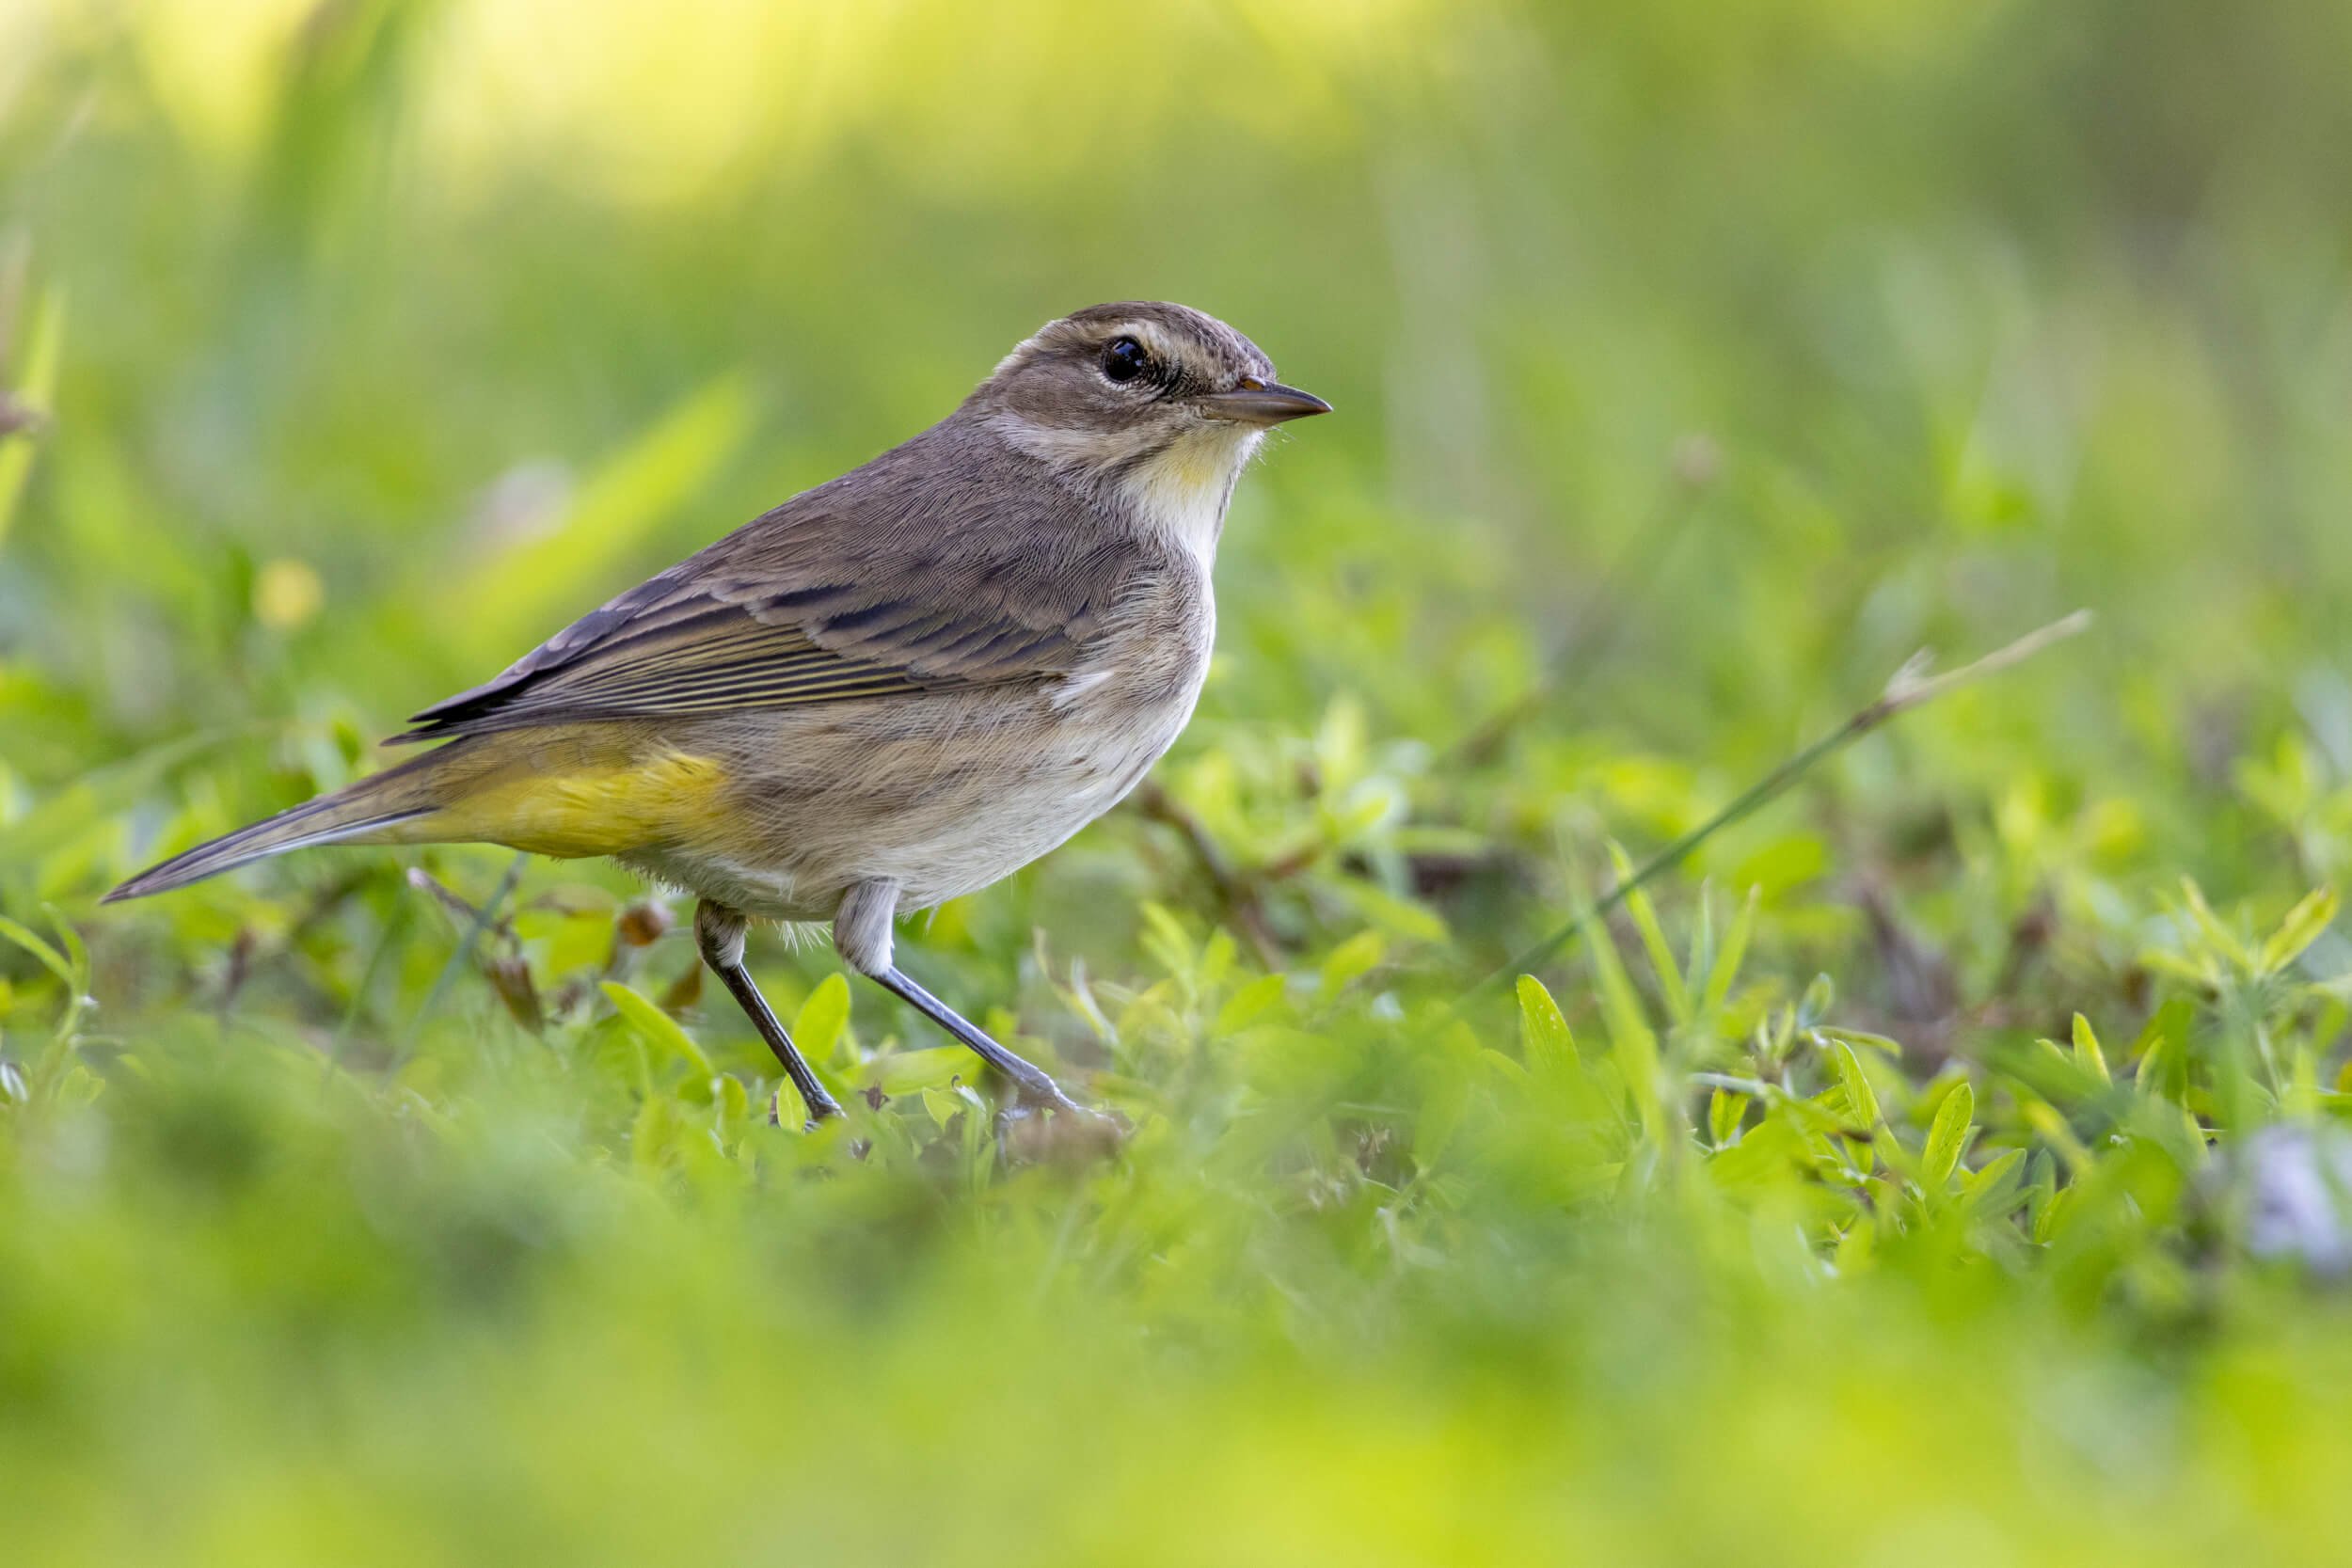
Palm warbler | Canon R10 + Canon RF 100-400mm F5.6-8 IS USM | ISO 800, 1/250, f/8 @ 400mm
This is where manual with auto ISO comes in. In this mode, you set the aperture and shutter speed, and the camera chooses to raise or lower the ISO depending on the amount of light needed for the exposure.
Why do I prefer this mode?
Well, for starters, ISO is the only element of the exposure triangle that doesn't affect the creative aspects of your photo (other than the grain it can add to an image). It doesn't affect the depth of field, the background blur or bokeh, or how much you've frozen the action in the photo. As long as the ISO doesn’t go so high that my picture isn’t usable, I don't care what it is and let the camera decide.
The beauty of this mode is that when the scene, environment, or amount of light changes, the camera automatically adjusts the ISO to ensure the scene is correctly exposed. This can be helpful when you need to take a quick shot without changing any settings.
Examples of Manual with Auto ISO in Action
To demonstrate the effectiveness of manual with auto ISO, let me give you a few examples.
Example 1: Changing Light Conditions
Suppose a subject in a dark forest, and suddenly, something pops up in a brighter area. With manual with auto ISO, you can instantly change the exposure without manually adjusting too many settings.
Example 2: Shooting Moving Subjects

Imagine you're shooting a goose standing motionless at 1/500 or slower and you notice it’s about to flap its wings and you want to increase your shutter speed to 1/2000 to freeze the action. With manual with auto ISO, your camera will automatically increase your ISO to ensure that you get the same exposure.
Read more: How to Photograph Geese (Tutorial)
Example 3: Shooting Against the Sun

Turkey vulture | Canon R10 + Canon RF 100-400mm F5.6-8 IS USM | ISO 1600, 1/100, f/8 @ 400mm
As a wildlife photographer, I love shooting subjects against the rising or setting sun. But often, this action happens quickly, without time to change your settings. With manual with auto ISO, you can select your aperture and shutter speed and let the camera adjust the ISO to ensure your subject is exposed correctly.
The Secret to Using Auto ISO Correctly: Exposure Compensation
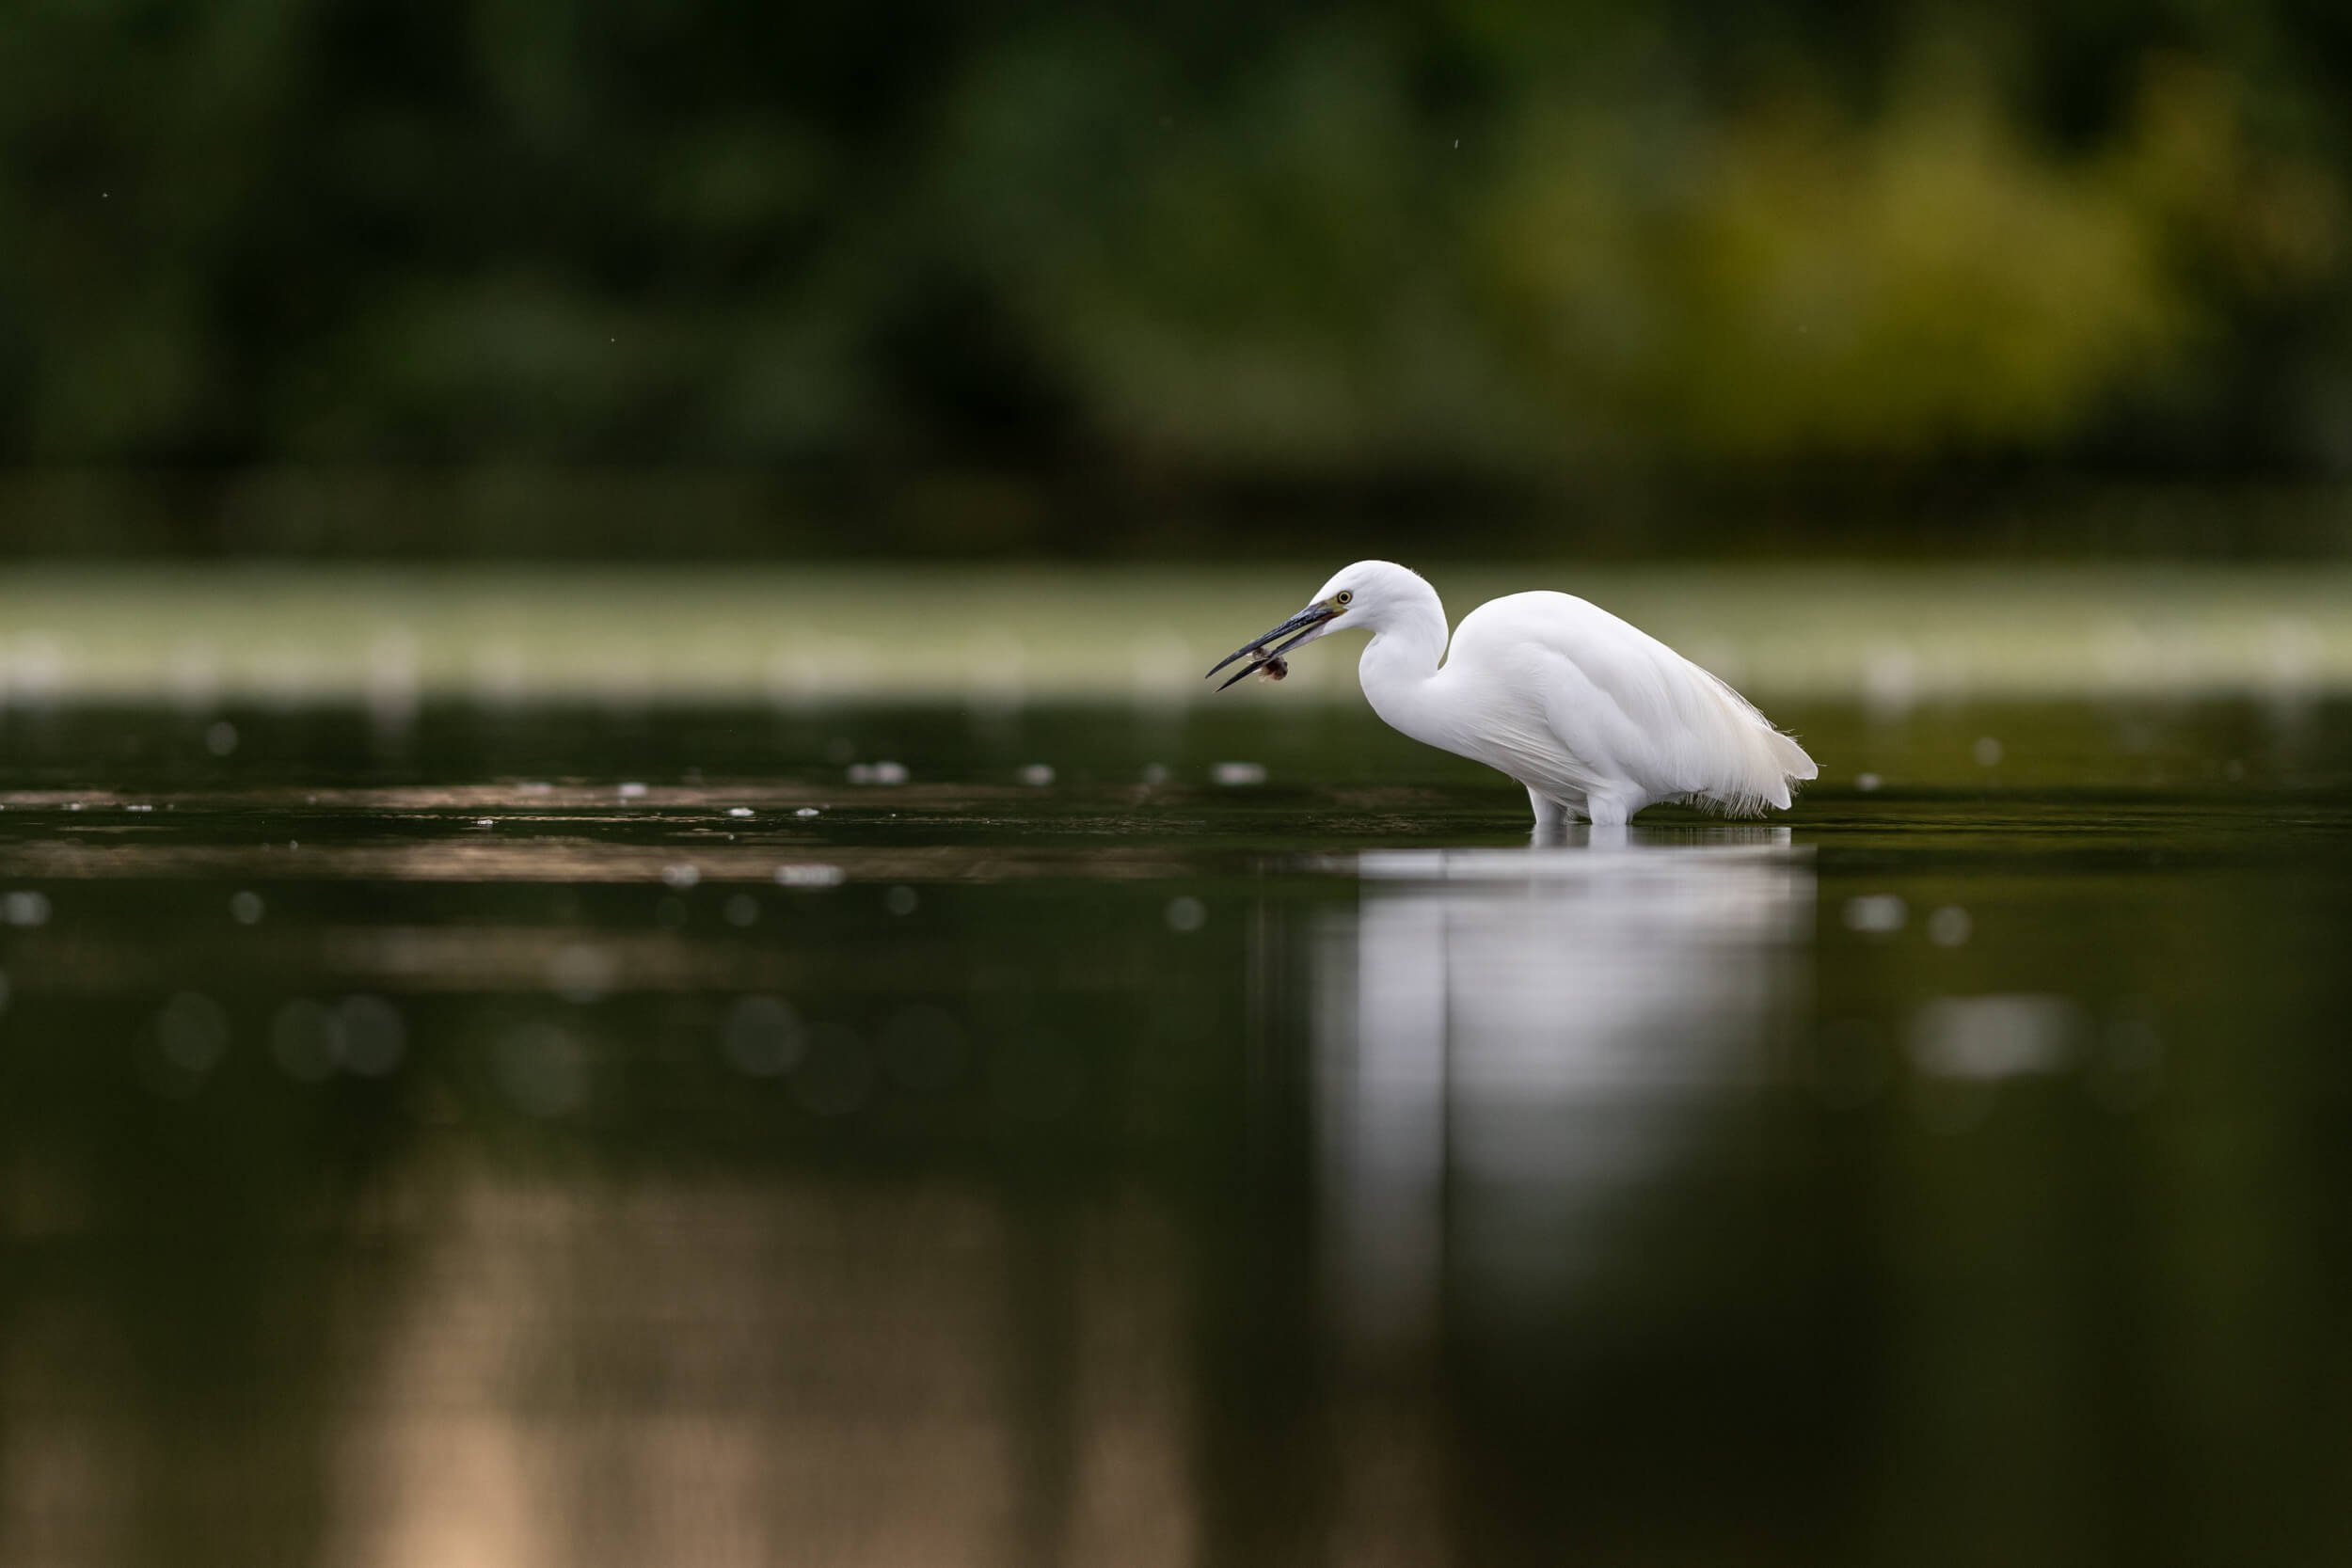
Little egret | Nikon D500 + Nikon 300mm f/2.8 | ISO 360, 1/1000 f/2.8
While auto ISO is useful, I highly suggest combining it with exposure compensation. Your camera tries to make every scene medium gray, so if the scene is too bright, it will try to darken it, and if it's too dark, it will try to lighten it.
However, there may be better choices for your photo. Exposure compensation is essential to save you from blowing the highlights or darkening an image past the point of usability.
If you have a light subject against a dark background or a dark subject against a light background, the camera's automatic choice may not work well. You may end up properly exposing the overall scene but under or overexposing your subject, which is the most critical aspect of your photo.
For example, if a bird is flying against a bright background, the camera will evaluate the scene, see the bright sky, and try to darken it. Therefore, you need to add exposure to compensate for this.
If you use a histogram, make sure you don’t push it too far to the left or right, or you risk losing a lot of detail in your RAW file. If your camera has blinkies or highlight alerts to let you know when you’ve blown out your image, reduce the exposure with exposure compensation.
How to set up Manual with Auto ISO
To set up manual with auto ISO, turn your top dial to M for manual mode. After that, go into your settings and set the camera to Auto ISO.
Then, set a maximum and minimum ISO value, which you can choose based on your preferences and the camera’s noise performance. Once that’s done, you’re ready to go!
Benefits of Manual with Auto ISO

Black-headed gull | Nikon D500 + 300 PF + 1.4x TC | ISO 800, 1/2000, f/8 @ 420mm
Now that you know how manual with auto ISO works and how to use it, let me explain why I prefer this mode for photography.
Quick Adjustments
The primary benefit of manual with auto ISO is the ability to quickly adjust your exposure without manually changing all settings. This can be crucial when shooting fast-moving wildlife because you may not have time to change anything.
Creative Control
This setting also gives you complete creative control over your photos. You can set your aperture and shutter speed to achieve your desired depth of field and freeze the action. Meanwhile, the camera automatically adjusts the ISO to expose the scene properly while you're focusing more on your compositional techniques, like the rule of thirds.
Consistent Results
Manual with auto ISO also gives you consistent results because the camera adjusts the ISO to ensure that your exposure is constant regardless of changing light conditions. Remember not to rely entirely on the camera since it always tries to get a medium gray exposure.
Versatility
Lastly, using this technique is versatile because you can use it in various lighting conditions, from bright sunlight to dark forests.
When to Not Use Auto ISO
Although Auto ISO is a valuable tool, it may be unnecessary in certain situations. For example, if you're a landscape photographer shooting on a tripod, working slowly and deliberately, you may want full control over all settings. This is when you should avoid using Auto ISO.
Additionally, in situations where your subject is moving in and out of different lighting, such as a European robin hopping from branch to branch in the forest, switching to full Manual mode without Auto ISO may be best to maintain a consistent exposure.
Conclusion

Eurasian whimbrel | Nikon D500 + 300 PF + 1.4x TC | ISO 1250, 1/4000, f/5.6 @ 420mm
In conclusion, manual with auto ISO may be the best setting for wildlife photography because it helps us focus more on the creative process and composition. It allows you to make quick adjustments, have control, achieve consistent results, and gain more versatility. While it may take some time to get used to, the benefits are well worth it.
As photographers, we have to make many decisions in seconds. A setting that takes one of these choices off our plate can be huge.
If you can learn to embrace auto ISO and let your camera do the heavy lifting, I guarantee you’ll get more keepers on your memory card and have more time to focus on enjoying your photography.
As a wildlife photographer, I highly recommend trying manual with auto ISO. Remember to use exposure compensation to ensure that your subject is exposed correctly, and don't be afraid to experiment to achieve your desired results.
Want to become a better wildlife photographer?
If you are interested in learning more about the technical and artistic side of photography to take your photos to the next level, check out these awesome tutorials that can help you take amazing wildlife photos!